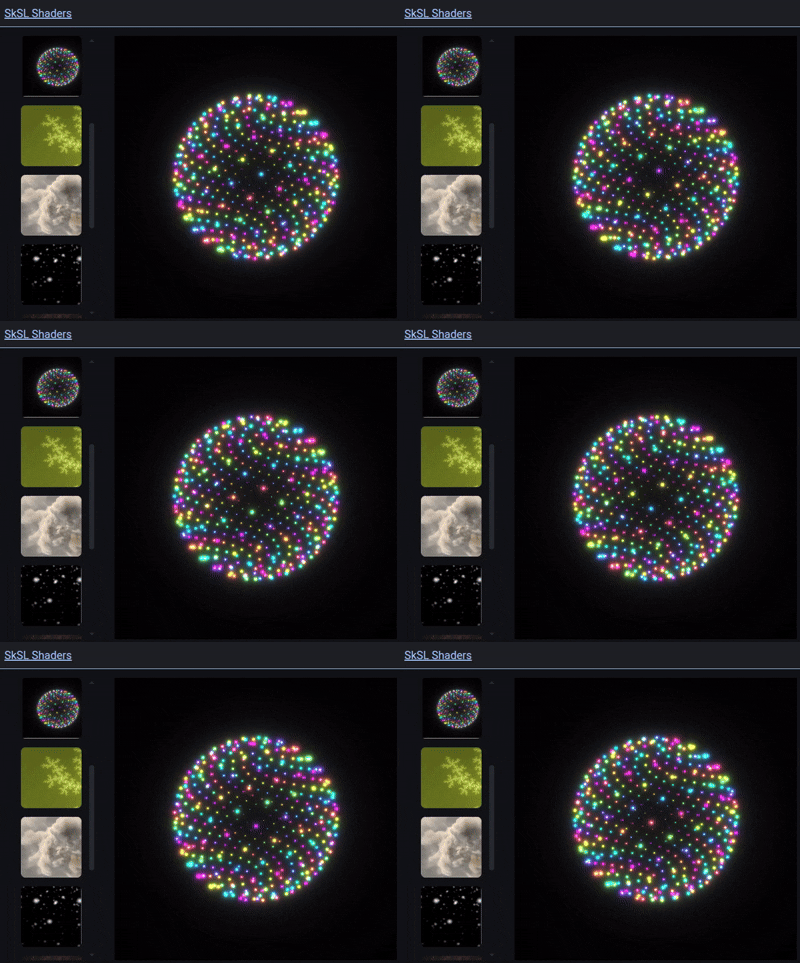
Modern mobile UIs increasingly rely on rich visual effects: gradients, blurs, distortions, ripple animations, and real-time visual feedback. On Android, AGSL (Android Graphics Shading Language) enables developers to create these effects efficiently by running custom GPU shaders directly within the Android rendering pipeline.
This article provides a quick, practical introduction to AGSL, explains where and how it is used, and compares it with similar technologies on iOS and other platforms, helping Android developers understand when AGSL is the right tool.
What is AGSL?
AGSL (Android Graphics Shading Language) is Android’s domain-specific shading language used to write fragment shaders that run on the GPU.
Key points:
Based on SkSL (Skia Shading Language)
Designed to be safe, portable, and optimized for Android
Integrated with Skia, Android’s 2D graphics engine
Primarily used for pixel-level visual effects
AGSL shaders operate on pixels, not geometry. This makes them ideal for:
Color transformations
Distortions
Gradients
Blur and glow effects
Procedural textures
Why AGSL Exists
Historically, Android developers relied on:
XML drawables
Canvas drawing
RenderScript (now deprecated)
OpenGL ES (powerful but complex)
AGSL fills an important gap:
✅ Easier than OpenGL / Vulkan
✅ More powerful than XML or Canvas
✅ GPU-accelerated
✅ First-class support in modern Android APIs
It is especially relevant in the Jetpack Compose era, where expressive UI and animations are core expectations.
Apply shaders to backgrounds, images, or custom layouts
This integration makes AGSL extremely powerful for modern UI effects.
Performance Characteristics
AGSL shaders:
Run on the GPU
Are compiled and optimized by Skia
Avoid CPU-bound rendering
However, AGSL offers excellent performance-to-complexity balance:
Complex shaders can still impact frame time
Overuse can increase GPU load
Always test on low-end devices
Comparison with Other Platforms
On iOS, the closest equivalent is Metal Shading Language (MSL).
AGSL is UI-centric and constrained, while Metal is a general-purpose GPU API.
Flutter also supports custom shaders via SkSL-compatible fragment programs.
Aspect
AGSL (Android)
Metal (iOS)
Level
High-level, 2D-focused
Low-level, full GPU
Complexity
Low–Medium
High
API Integration
Skia / Compose
Metal framework
Use Case
UI effects, 2D shaders
UI, 3D, compute
Learning Curve
Gentle
Steep
When Should You Use AGSL?
Use AGSL when you need:
✨ Custom visual effects
🎨 Dynamic gradients or distortions
🌊 Shader-based animations
⚡ GPU-accelerated UI rendering
Avoid AGSL when:
A standard Compose modifier already exists
The effect is static and simple
Maintainability is more important than visual fidelity
Limitations of AGSL
Fragment shaders only (no vertex shaders)
Limited API surface (by design)
Debugging can be harder than CPU code
Not suitable for complex 3D rendering
AGSL is not a replacement for OpenGL, Vulkan, or Metal.
AI agents are a paradigm shift in how we design and interact with artificial intelligence. AI agents are programmed not only to respond to a single query but to reason, plan, act, and iterate on their own in order to reach a goal.
This piece will examine what AI agents are, how they function, what distinguishes them from traditional AI processes, the skills needed to excel at agentic AI, and the most popular tools you can currently utilize to build your own AI agents.
Observe the outcomes and make adjustments in strategy;
Unlike conventional AI models (e.g., chatbots), AI agents are goal-oriented. They do not merely respond to inquiries — they make decisions on what actions to take next. This renders the AI agent a very effective tool for automation, research, testing, software development, data analysis, and decision-making systems.
It is useful to distinguish between:
LLMs → Responses to individual prompts;
Workflows → Predefined, human-designed sequences of steps;
Agents → Systems that choose and control the workflow themselves;
Core Components of an AI Agent
Most AI agents are based upon a few key elements:
Reasoning Engine
The reasoning layer is accountable for goal understanding, task breakdown, and determining the best possible next action. This is usually done with the help of an LLM (Large Language Model).
Planning
Planning enables the agent to plan the sequence of actions rather than acting step by step. Some agents plan ahead, while others plan dynamically after the execution of each action.
Memory
Memory enables agents to store: Past behavior, Intermediate results and Long-term knowledge. The knowledge that can be maintained within long-term memory needs to be adequate for the character to progress appropriately in the story. The type of knowledge that should be stored in this region of memory is the ability to ride a bicycle. This skill requires practice, and the character should demonstrate that they have learned it.
Tools & Actions
The agents interact with the world through tools such as: APIs, Databases, File systems or Browsers.
Feedback & Iteration
The agents assess the outcome of their actions and make decisions on whether to continue, retry, or modify their strategy. This process is what gives the agents autonomy. In agentic systems, decision-making is entrusted to the AI itself and not hard-coded by programmers.
Skills Needed to Master Agentic AI
Agentic AI requires more system design skill than prompt writing skill. The important skills are:
Goal Decomposition — The capacity to decompose complex objectives into smaller, solvable tasks that the agent can reason about.
Tool Design — Well-designed tools are essential. Agents work better when tools are: Clearly defined, Narrow in scope and Deterministic when possible.
Evaluation & Guardrails — Agents must have constraints to prevent infinite loops, hallucinations, or unsafe behaviors. These include: Success criteria, Step limits and Validation rules.
Memory Management — How much the agent should remember, and for how long, is a major architectural choice.
Human-in-the-Loop Design — In most practical scenarios, the agents would be working semi-autonomously with human approval checkpoints rather than full autonomy.
Iterative Improvement — Performance is improved through experimentations, logging, and refinements rather than one-shot executions.
Systems Thinking — In Agentic AI, one has to think beyond the response, including orchestration, observability, failure modes, and scalability.
Agent Frameworks for Developers
The environment for developing AI agents is an ever-changing one. Some of the most popular tools being used currently are listed below.
LangChain – A widely used framework that chains LLMs together using tools, memory, and control logic.
CrewAI – Emphasizes the collaboration of multiple agents with defined roles.
AutoGPT-like frameworks – Early autonomous agents that cycled between planning and execution loops.
Koog.ai – A Kotlin‑centric framework for developing AI agents, emphasizing strong typing, modular prompt executors, and a clean separation of reasoning, tools, and orchestration. Especially suited for backend and Android‑adjacent spaces.
Testing Android apps is often repetitive, time-consuming, and hard to scale. Recently, I started experimenting with agentic AI to automate mobile testing—combining Kotlin, Koog, and LLMs to build a smart tester that can execute real end-to-end scenarios.
As an Android developer, I’ve used Espresso, UIAutomator, and other frameworks. They’re powerful, but still rigid: you need to write detailed test scripts and keep them updated. I wanted to explore whether an AI agent could take high-level goals like “Log in and navigate to the profile screen” and figure out the steps automatically.
How It Works
The project is powered by Koog.ai and Kotlin, using an LLM as the reasoning engine (options include Gemini, Llama, GPT, or Gwen). Here’s the flow:
The backend is built with Ktor in Kotlin and powered by a custom Koog agent (MobileTestAgent) plus a toolkit of device actions (MobileTestTools).
Ktor API
The Ktor server exposes endpoints that receive test scenarios and configuration (LLM model, temperature, iterations). Each request is routed to the MobileTestAgent, which runs the scenario with the chosen parameters.
MobileTestAgent (Koog Agent)MobileTestAgent encapsulates the Koog agent setup. It translates high-level test goals into an iterative reasoning process, where the LLM plans actions like “tap login button” or “enter text”. The agent respects limits such as max iterations and temperature to balance creativity and determinism.
MobileTestTools (Device Interaction)MobileTestTools provides the executable layer via ADB commands. It includes functions for:
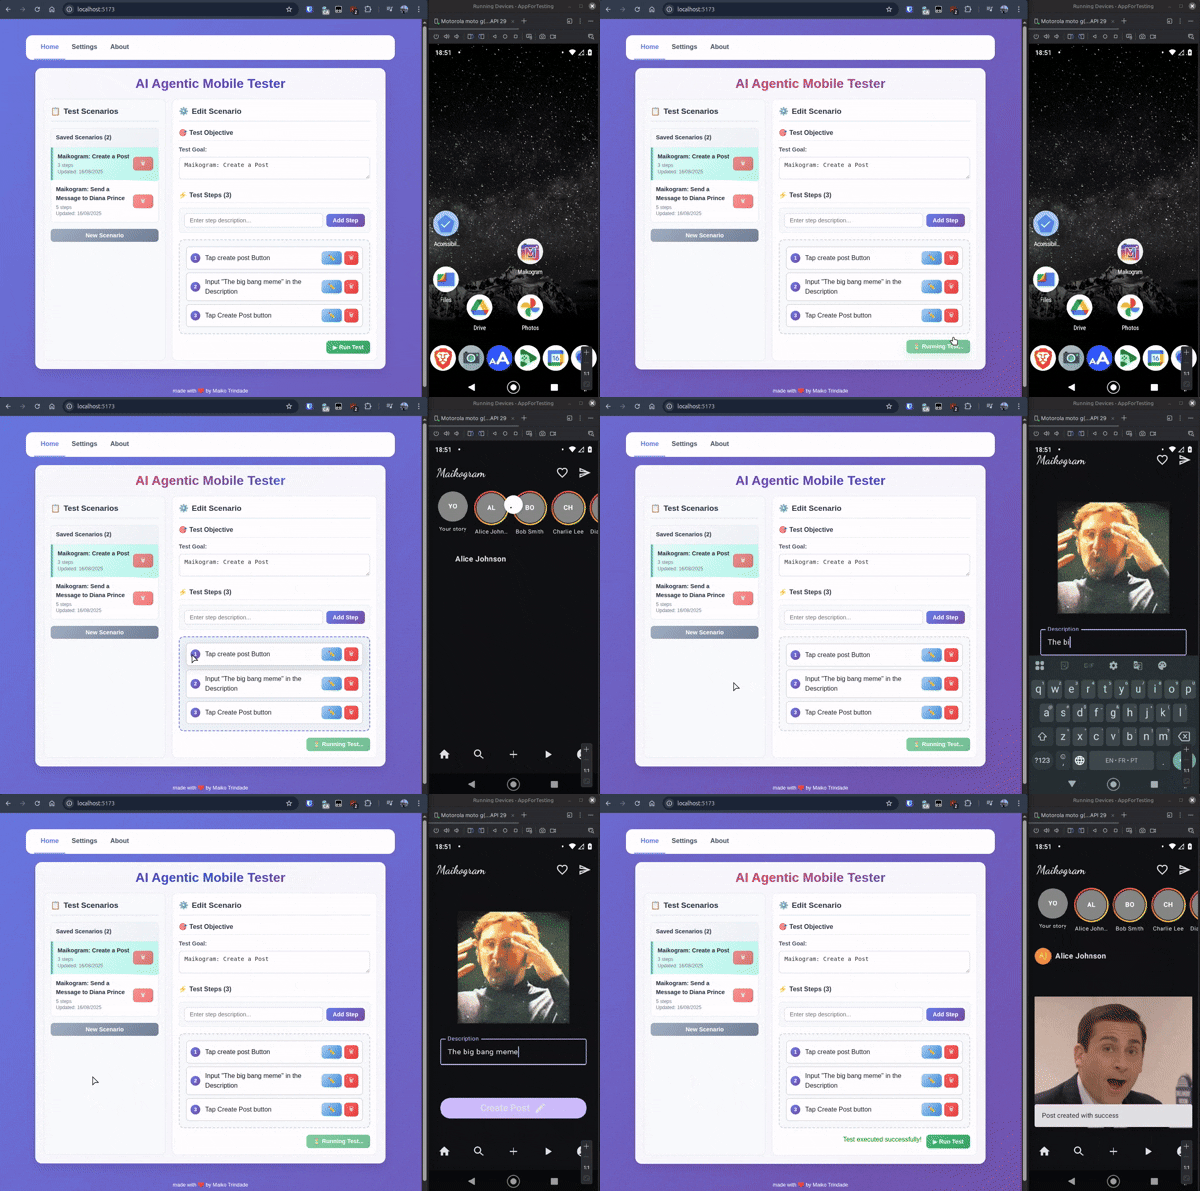
To showcase the system, I created a simple demo Android app.
The agent can interact with it and validate flows end-to-end.
Example Flow
User defines a scenario: “Tap Add Post button → Input “some text” in the Description → Tap Create Post button”
The AI agent receives it, plans the steps, and uses ADB actions (tap, type, scroll, assert text).
A report is generated with success/failure details.
No need to maintain test scripts—just provide the goal.
Why Kotlin + Koog?
Kotlin gave me the flexibility to build a clean API with Ktor and manage complex agent logic easily. Koog.ai, with its Model Context Protocol (MCP) integration and agentic design, allowed me to connect the LLM with Android tooling like ADB seamlessly.
This mix of Kotlin, LLMs, and Android dev tools opens a new way of thinking about mobile testing: instead of scripting, you describe intentions.
This was a fun experiment mixing Kotlin + AI agents + Android testing. If you’re curious about agentic AI, Koog, or just want to rethink mobile testing, I’d love feedback, feel free to DM on LinkedIn! 🚀
Koog is an innovative, open-source agentic framework built by JetBrains. It empowers Kotlin developers to create and run AI agents entirely within the JVM ecosystem, leveraging a modern Kotlin DSL. This means you can build intelligent, autonomous agents with the same ease and productivity that Kotlin brings to everyday development.
The Benefits of Koog for Your AI Agentic Projects
Koog offers a compelling set of features and advantages that make it an excellent choice for anyone looking to dive into AI agent development with Kotlin:
Pure Kotlin Implementation: Build and run your AI agents entirely in idiomatic Kotlin. This means leveraging all the benefits of Kotlin – conciseness, null safety, and excellent tooling – for your AI projects.
Modular Feature System: Extend your agent’s capabilities through a highly composable feature system. This allows for flexible and scalable agent design.
Tool Integration: Koog allows you to create and integrate custom tools, giving your agents access to external systems and resources. This is crucial for agents that need to interact with the real world or specific APIs.
Powerful Streaming API: Process responses from Large Language Models (LLMs) in real-time. This is essential for responsive user interfaces and efficient handling of large outputs. It even supports invoking multiple tools on the fly from a single LLM request.
Intelligent History Compression: Optimize token usage while maintaining conversation context through various pre-built strategies. This helps manage costs and improves efficiency when dealing with long conversations.
Persistent Agent Memory: Enable knowledge retention across different sessions and even between different agents, leading to more robust and capable AI.
Comprehensive Tracing: Debug and monitor agent execution with detailed and configurable tracing of LLM calls, tools, and agent stages. This provides invaluable insight into your agent’s behavior.
Support for Various LLM Providers: Koog integrates with popular LLM providers like Google, OpenAI, Anthropic, OpenRouter, and Ollama, giving you flexibility in choosing your underlying AI models.
My Experience with Koog
As someone who is currently working on an AI agentic project and, honestly, without previous AI code experience, I can confidently say that Koog (version 0.2.1) is super good for it. The framework’s design is incredibly intuitive, making it easy to grasp the core concepts of building AI agents. The clear documentation and the idiomatic Kotlin approach meant that I could quickly get started and see tangible results. The ability to integrate tools and design complex workflows without getting bogged down in low-level AI complexities has been a game-changer for my project.
Conclusion
Koog is truly a game-changer for Kotlin developers venturing into the exciting field of AI agents. Its pure Kotlin implementation, comprehensive features, and developer-friendly design make it an exceptionally powerful and enjoyable framework to work with. It’s clear that JetBrains has put a lot of thought into making AI agent development accessible and efficient. Even for someone like me, who previously lacked extensive AI coding experience, Koog has proven to be incredibly easy to work with and an excellent foundation for building sophisticated AI agentic projects. If you’re a Kotlin developer looking to build AI agents, I highly recommend giving Koog a try – you won’t be disappointed!
Android development just got a significant upgrade with the introduction of Gemini Journeys in Android Studio. This innovative AI-powered feature promises to transform how we approach end-to-end testing by leveraging natural language prompts instead of traditional manual test creation.
What is Gemini Journeys?
Gemini Journeys represents a paradigm shift in mobile testing methodology. Instead of writing complex test scripts line by line, developers can now describe their testing intentions in plain English, and Gemini AI translates these prompts into comprehensive end-to-end tests.
The feature integrates seamlessly with Android Studio’s preview environment, offering developers an intuitive way to:
Generate automated UI tests through conversational prompts
Create comprehensive test scenarios without deep testing framework knowledge
Accelerate the testing workflow significantly
Reduce the barrier to entry for comprehensive mobile testing
Hands-On Experience: Building with KoinBase
To explore Gemini Journeys’ capabilities, I created a demo project called KoinBase - a simple cryptocurrency tracking application built with Jetpack Compose. The app showcases modern Android development practices while serving as a perfect testing ground for AI-assisted test generation.
Key Features of the Demo:
Clean Architecture: Implementing MVVM pattern with proper separation of concerns
Jetpack Compose UI: Modern declarative UI framework
Dependency Injection: Using Koin for lightweight DI
Network Integration: RESTful API consumption for crypto data
Material 3 Design: Following latest design guidelines
First Impressions: A Game Changer
After experimenting with Gemini Journeys on the KoinBase project, here are my initial thoughts:
The Good:
Intuitive Workflow: Describing test scenarios in natural language feels remarkably natural
Productivity Boost: Test creation time reduced significantly compared to manual approaches
Intelligent Context: Gemini understands app structure and suggests relevant test scenarios
Quality Output: Generated tests are comprehensive and well-structured
The Promise:
This technology represents a fundamental shift toward more accessible and efficient mobile testing. For teams struggling with testing coverage or developers new to automated testing, Gemini Journeys could be transformational.
Looking Forward
Gemini Journeys appears to be more than just another AI tool - it’s positioning itself as a genuine game changer for mobile testing workflows. The ability to generate robust E2E tests through conversational prompts could democratize comprehensive testing practices across development teams of all skill levels.
As AI continues to integrate deeper into development workflows, features like Gemini Journeys demonstrate how machine learning can augment human creativity rather than replace it. The future of Android development looks increasingly collaborative between human insight and artificial intelligence capabilities.
Try It Yourself
Interested in exploring Gemini Journeys? Check out the official documentation and consider experimenting with your own projects. The KoinBase demo is also available as a reference implementation.
The intersection of AI and mobile development continues to evolve rapidly, and Gemini Journeys represents an exciting step toward more intelligent, efficient development practices.